Hello Beauties! I’m Tara, founder of Haute Lunch Beauty and Fashion Blog, and I’m absolutely thrilled to be writing a guest post for Scribbles from Emily! Today I want to show you all how to create a quick and easy makeup look that is perfect for spring and summer!
This season, citrus, jewel tone, and pastel colors are showing up everywhere, which is great because these colors look fabulous on eyes, lips, and cheeks! Although brightening up your makeup may seem risky to some, this tutorial will help you do it with confidence and ease!
Before I get started on the application, I want to talk about the products I used to create this look. By no means do you need to use the exact same products. Any brand will do, so long as the colors are similar and the products serve the same purpose.
1-6. Eye Shadows from Tarte’s Spring Greening Palette
1. Warm Rose
2. Teal
3. Bronze
4. Pale Pink
5. Lime Green
6. Lilac
7. Revlon Super Lustrous Lipgloss in Coral Reef
8. M.A.C. Sheertone Shimmer Blush in Blush Baby (peach-colored)
9. Philosophy Never Let Them See You Shine Face Primer
10. Lorac Behind the Scenes Eye Primer
11. Tarte EmphasEYES for Brows in Taupe
As you can see, eye shadow, lip color, and blush are key to updating your look this season, but there are a few other products I think are important to mention as well.
First, I want to talk about primers. If you’re like me, you’re usually in a hurry to get out the door, and adding a step to your makeup routine is the last thing you want to do. However, adding a primer to my makeup routine was one of the best moves I’ve ever made. Why you ask? Well, that’s because in the long run, it saves me both time and money! Face and eye primers create the perfect base for makeup, saving me time by allowing me to achieve the rich pigment I want from my blush and eye shadow quickly. Primers also save me money because I can use substantially less product every time I apply my makeup. If those reasons aren’t good enough on their own, priming also makes your skin and makeup look satiny smooth and keeps your makeup looking fresh all day! I think I’ve made my point. 😀
The other product I want to point out that I think many people overlook is an eyebrow pencil. This year, there is definitely a trend toward fuller, more natural eyebrows. An eyebrow pencil helps fill in thin eyebrows and gives your eyes a nice frame so they can really pop! Brow waxes and powders can be used instead of an eyebrow pencil, but I recommend pencils because they allow for easier, more precise application.
Now that I’ve talked about some important but often overlooked products, let’s dive into the tutorial! Of course, you always want to start your makeup application with a clean, dry face. From there, prep your face for makeup application with your face and eye primers, then apply your foundation and/or powder as you normally would. Now for the fun part!
Step 1: Apply Blush. For this look, I’m using a pastel peach colored blush from M.A.C., but anything similar in color will do. Apply blush from the apples of your cheeks up to your temples. Also apply a little blush to your forehead, the bridge of your nose, and your jaw line to even out the look and give you a nice, sun-kissed glow!
Step 2: Apply Base Eye Shadow. I’m using eye shadow #4, which is a pale pink. Again, any pale pink eye shadow will do. Apply this shadow from just under your eyebrows all the way down to your eyelashes. A fluff brush works best for this, but use whatever you have on hand.
Step 3: Apply Eye Shadow to Lid. For this step, I’m using eye shadow #5, which is a lime green! To avoid fall out, dab the eye shadow onto your lid before blending. I like to use a thick eye shadow brush with short bristles for this step (such as M.A.C.’s 214 Short Shader Brush), but again, use what you have.
Step 4: Apply Eye Shadow to Crease. Here I’m using eye shadow #2, which is teal in color, to line the crease of my eyelid. To avoid getting too much shadow by your tear duct, start in the middle of the crease, then work your way in. After you’ve lined this half, go to the outer corner of your eye (think of an imaginary line from the end of your eyebrow to the outer corner of your eye- this is where you want to start this time) and finish lining the rest of your crease. To finish, simply blend the color from the crease up a bit (approx ¼ inch) on the outer edges of your eyes. This three step eye shadow application is very versatile and helps your eyes look big and beautiful!
Step 5: Apply Eyeliner and Mascara. For this look, I used a silver green eyeliner from Sephora and Physician’s Formula PlentiFull Mascara in black-brown. This season, using colored eyeliners is definitely trendy, so don’t be afraid to try out a few new shades. Plus, eyeliner pencils last a long time, and are often inexpensive! To line your eyes, start in the middle of your upper lash line (never line inside your lash line as this could cause eye infections) and work your way in, then go to the outside of your upper lash line and work your way back to the middle. On the bottom lash line, just start at the outside and line to the middle of your eye. Lining only the outer half of your lower lash line will make your eyes look bigger than if you line them all the way. Finish off by curling your lashes and applying a coat of mascara.
Step 6: Fill in Those Brows. Using my Tarte EmphasEYES brow pencil, I filled in the outer edges of my brows since they are a little sparse. Be sure to use a brow pencil that is approximately the same color, or one shade darker, than your brows. Also, be sure to smooth out those brows with a brow brush once you’re finished filling them in!
Step 7: Line Your Lips. For this step, I’m using an Ulta Contour Lip Pencil in Rose because I’m going to use a coral colored lip gloss. Using a lip pencil that is slightly darker than your lip gloss will help give a nice, defined look to your lips, which is especially important when using light colored lipsticks or glosses.
Step 8: Apply Lip Gloss or Lipstick. This season, bright, opaque lip colors are definitely in! There are many opaque lip glosses available now, such as the coral colored gloss I’m using from Revlon, but lipstick will work fine, too. Fill in your lips with color, and if you do use a lipstick, finish them off with a thin coating of gloss to give them some shine!
The finished look:
Here is a closer look at my eye color so you can better see how I applied and blended the three shades:
Now that you know how to create this look, you can play around with different colors to create fun, flirty looks that are perfect for spring. For example, here is the color scheme I used…
But you could also use this pastel color scheme to create another beautiful look:
This latter color scheme uses the same pale pink eye shadow (#4) as a base, a lilac eye shadow (#6) for the lid, and a rose eye shadow (#1) for the crease. I would combine this eye color combination with a watermelon colored gloss and a slightly darker blush, such as Benefit’s Dallas, which is a rosy bronze.
As I hope you can see, you don’t have to spend a lot of time or money to look beautiful and trendy! This entire look took me less than 10 minutes to create, and I used products I already had in my makeup drawer. Even if you don’t have some of the colors necessary, you can pick up a few new eye shadows, new blush, and some new lip gloss for less than $20! I hope this tutorial gives you the knowledge and confidence to try some fun new makeup looks this season. Thanks again to Emily for inviting me to share my love to makeup with you all, and good luck with this week’s homework!
xoxo- Tara
Emily here: Tara, thank you so much for this very thorough and informative post! I’m glad I knew an expert I could call on to write about this topic! I don’t know about the rest of you all, but I sure learned a few things. Tara manages to share great tutorials, tips, and inspiration several times a week, while going to school for a PhD in psychology. In fact, today she’s defending her Master’s proposal! Be sure to check out Tara’s blog and cheer her on, and check out the wealth of information in her archives!
For your information:
Here’s where you can find the products Tara used, and some similar ones:
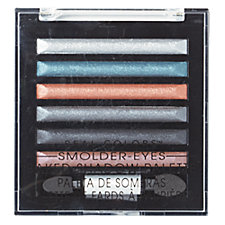
- Eye shadow palette: Real Colors Smolder-Eyes Shadow Palette Trickster
- Lip gloss: Revlon Super Lustrous Lipgloss
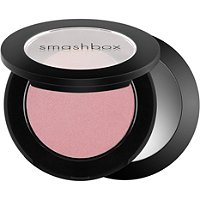
- Blush: Blush Rush
from Ulta
- Face primer: oil and shine control velvet touch primer – never let them see you shine – oiliness & large pores 1 oz. philosophy
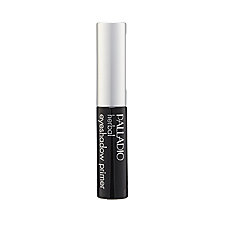
- Eye primer: Palladio Herbal Eye Shadow Primer
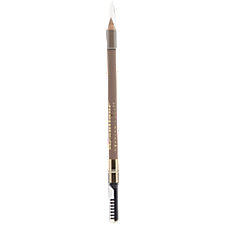
- Brow pencil: Beautique Brow Pencil Natural Blonde
4. Wear four different styles of tops this week. If you tend to wear tee shirts every day, this one is for you! Mix up your sleeve length, add a button up, go sleeveless, or whatever else you can come up with!
To give you some accountability, snap a picture of yourself in the mirror, or of your outfits. Choose one to share on the Scribbles facebook wall, or make a collage of them and share it with us.
If today’s post made you wish you had some new makeup, this week’s giveaway is your chance to get some for free! I’m giving away:


Hi. Thank you for the great tutorial. I've never tried a primer, but I think it's time to break out of my rut and try it.
I was wondering though. I have olive skin and hazel eyes. Are there any colors of eye shadow that I should stay away from?
I'm a new follower and I'll be back to share my giveaway entries.
Robin,
I would avoid eye shadows with yellow undertones, such as gold, oranges, or of course, yellows. Blues and browns will look great with your skin, but to really bring out your hazel eyes (and to brighten up your look for spring), try a combination like the one about that used purples and pinks. A deep plum color will on your lids will really make your eyes look big and bright!
Thanks for the compliment!
Apparently, my comment system has stopped working on this post, but for all of you who already entered the giveaway, I do have all your comments still, they just aren't displaying. Intense Debate is being weird. I will try to get it figured out!
Tara did a great job in this post! Kudos to her. 🙂
I've never had to wear much make up because I always had perfect skin. Sadly this past year I've noticed my skin changing quite a bit and I've had to dig out the make up bag a bit. I still don't do much more than a bit of bronzer and playing up my eyes (mascara, sometimes eyeliner, and eyeshadow). I love playing with makeup, but it's never been part of my routine so it's something I like to do on special occasions. 🙂
This makeup tutorial was soooooo helpful! I am horrible at putting on makeup and even worse at picking it out. I'm absolutely going to try the eye shadow and get that lip gloss.
I hope I win either the All Over Color Stick or the e.l.f. Essentials Eye Shadow! 🙂
Following your blog. 🙂
Tweeted about it from @ChicagoQuirk
id love to win the e.l.f. Essentials Brightening Eye Shadow in Nouveau Neutrals 🙂
punkme15 at gmail dot com
Since Im allergic to silver/gold/surgical steel I think I should get a point for wearing a necklace for two days this week and not bursting with boils! Actually I made an effort and people commented how jewelry makes a difference. CIAO! and thanks-i credit you!